 Save
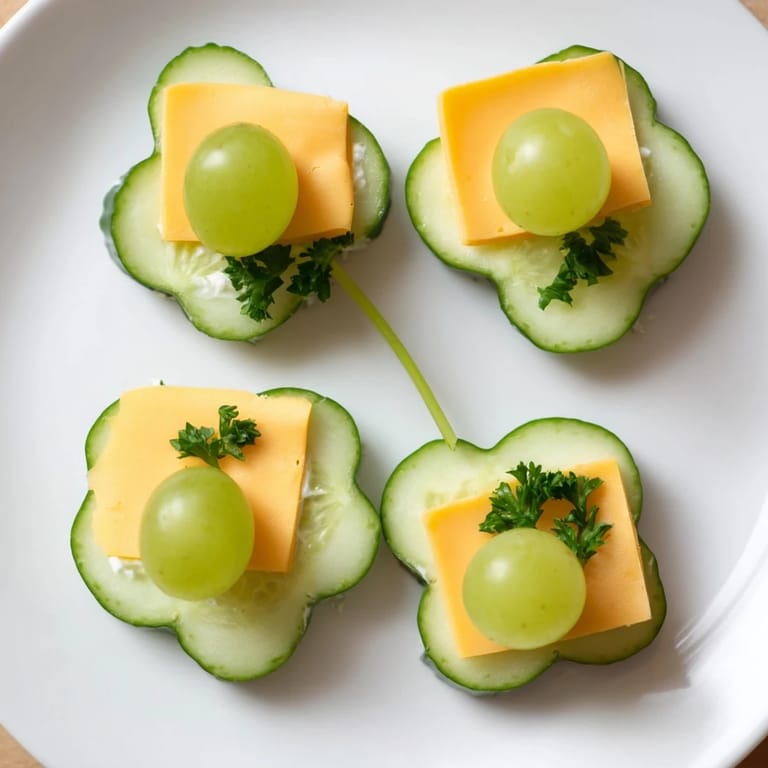
Save I discovered this delightful Lucky Four-Leaf Clover snack while helping my niece prepare for her school's St. Patrick's Day party. She wanted something special that would make the other kids smile, and I remembered how much children respond to food arranged with intention and whimsy. That afternoon, surrounded by cucumber slices and cheese rounds, we transformed simple ingredients into something magical—little edible clovers that looked almost too charming to eat. Now whenever I need to bring joy to a table, whether it's a celebration or just a Tuesday afternoon, these little green treasures make an appearance.
I'll never forget watching my daughter's face light up when she realized each piece on her plate was arranged to look like a four-leaf clover. That moment of pure delight—where food became more than sustenance and became a tiny spark of magic—taught me that the simplest preparations, when arranged with care and playfulness, create the most memorable meals.
Ingredients
- Round cucumber slices (16 total, about 1/4-inch thick): The foundation of your clover leaves, cucumbers bring a refreshing crunch and cool, clean taste. Pro tip: slice them just before assembling so they stay crisp and don't weep liquid onto your plate. If your cucumbers are particularly wet, pat them dry with a paper towel—this keeps everything stable.
- Thin round cheddar cheese slices (16 total, cut to match cucumber size): The vibrant golden-orange layer that crowns each leaf. Use a small round cookie cutter or the rim of a glass to cut perfect circles—the uniformity makes your clover look intentional and beautiful. Real aged cheddar tastes infinitely better than processed slices, and the flavor difference is absolutely worth it.
- Small green grapes or cherry tomatoes, halved (4 total): These become the lucky heart of your clover, nestled where all four leaves meet. Green grapes add sweetness and a jewel-like appearance, while cherry tomatoes bring slight tartness and visual pop. Choose whatever matches your mood that day.
- Celery sticks or thin pretzel rods (4 total, cut to 3-inch pieces): Your clover's stem, grounding the whole arrangement. Celery adds authentic garden vibes and extra crunch; pretzels add a playful, snack-like quality. If you go with celery, choose tender inner stalks—they're gentler and taste fresher than the tougher outer ones.
- Cream cheese or hummus (2 tablespoons): The invisible adhesive that holds everything together. Use just enough to make pieces stick without creating a glue-like appearance. A tiny dab goes a surprisingly long way.
- Fresh herbs like parsley or dill (finely chopped): The finishing sparkle that transforms your clover from cute to sophisticated. These herbs add color, freshness, and a whisper of sophisticated flavor that elevates the entire presentation.
Tired of Takeout? 🥡
Get 10 meals you can make faster than delivery arrives. Seriously.
One email. No spam. Unsubscribe anytime.
Instructions
- Gather and prepare everything first:
- Lay out your cutting board and get all your ingredients ready before you start assembling. Slice your cucumbers to about a quarter-inch thickness—thick enough to hold the cheese without breaking, thin enough to stay tender. Cut your cheese into rounds that match the cucumber size. Halve your grapes or cherry tomatoes. This prep work takes just a few minutes but makes the actual assembly feel like a breeze.
- Arrange your clover leaves:
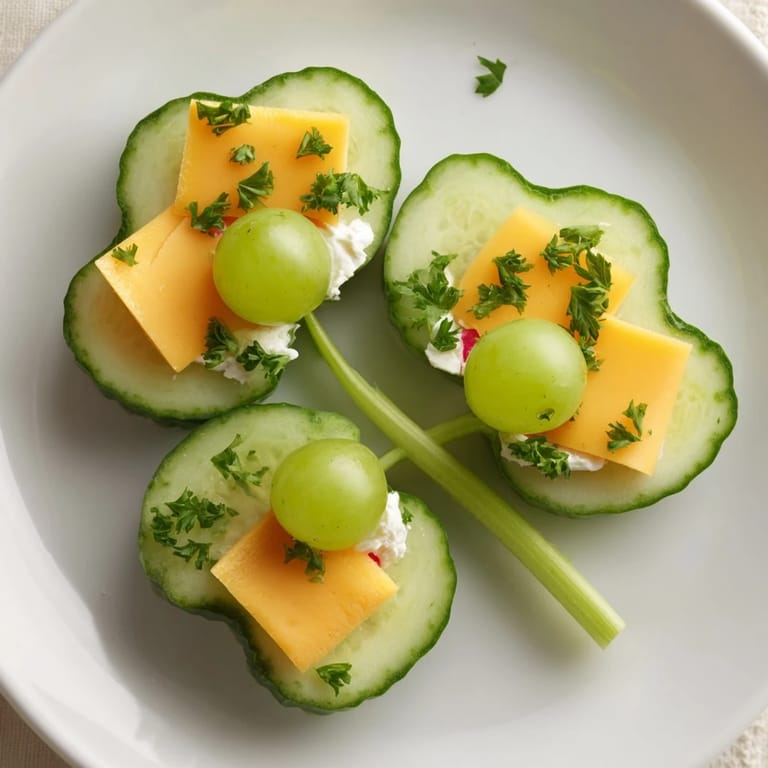
- On your serving plate, place four cucumber slices in a clover pattern, overlapping their edges slightly in the center so they form that classic four-pointed shape. Stand back for a moment and adjust until it feels balanced and intentional—this is where the magic starts happening.
- Crown each leaf with cheese:
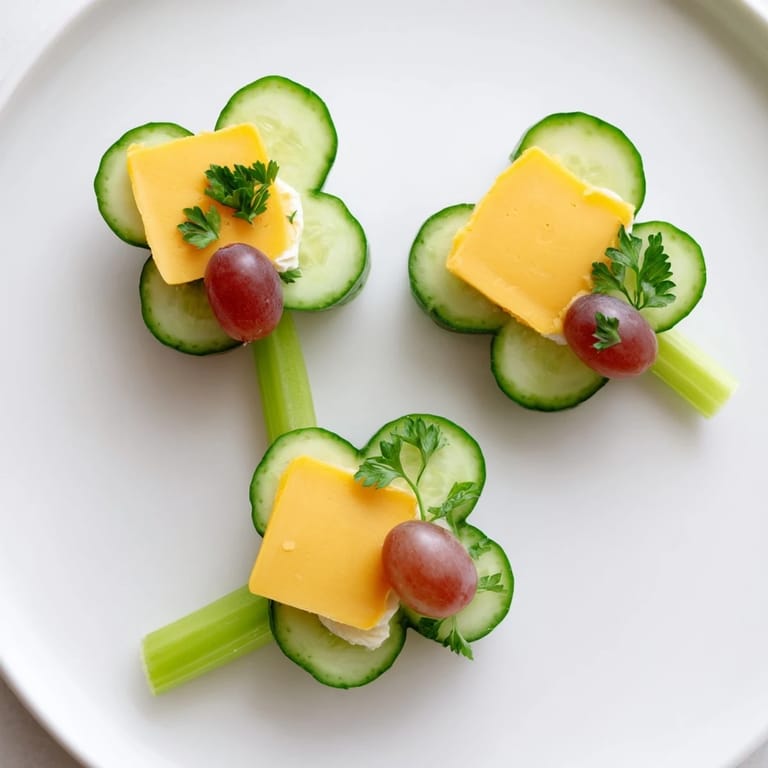
- Lay a cheddar round on top of each cucumber slice. The golden-orange cheese against the pale green cucumber creates a beautiful contrast. If the cheese feels slippery, a tiny dab of cream cheese on the back helps it stay put.
- Place the lucky center:
- Nestle your grape or tomato half right in the middle where all four leaves converge. Press it gently so it settles into place. This is the heart of your clover, so take a moment to position it just right.
- Add the stem:
- Tuck one end of your celery stick or pretzel rod slightly underneath the clover leaves, angling it naturally as if the clover grew from that stem. It should look effortless and organic, even though you're very deliberately placing it.
- Secure and finish:
- If anything feels wobbly, use the tiniest dab of cream cheese as edible glue between components. Sprinkle with fresh herbs right before serving—the herbs look brightest and smell most fragrant when freshly added. This is your chance to make it absolutely stunning.
- Repeat the magic:
- Create three more clovers using the same technique. Once you've made the first one, the rhythm becomes almost meditative, and each successive clover comes together more naturally.
 Save
Save The real magic happened not in the assembly, but in watching someone bite into one of these clovers with a smile. Suddenly they weren't just eating vegetables and cheese—they were participating in a moment of intentional joy, a tiny edible reminder that the people who care enough to arrange food with playfulness care about their happiness. That's when I understood these aren't snacks; they're small acts of love.
Perfect for Celebrations and Special Moments
These clovers shine on St. Patrick's Day, obviously, but they're equally welcome at spring celebrations, children's parties, or any gathering where you want to inject a dose of whimsy and intentionality. I've brought them to luncheons where sophisticated guests were charmed by their playfulness, and to school parties where they became the most sought-after snack on the table. The beauty is that they work everywhere because everyone appreciates food arranged with care and creativity.
Customizing Your Lucky Clovers
Once you understand the basic structure, you can make these entirely your own. Swap the cheese for sliced turkey or smoked ham for protein. Use cherry tomatoes instead of grapes for a more elegant, slightly savory version. Arrange them on a bed of fresh greens or a wooden board for presentation. The framework is simple enough that you can follow your intuition and the contents of your refrigerator—that's the beauty of this recipe.
Storing and Serving Strategies
These clovers are best assembled right before serving so everything stays crisp and fresh. However, you can prepare all your components earlier in the day—slice and store cucumbers in the fridge, keep cheese rounds ready, have your herbs chopped. Then assembly takes just minutes when guests are arriving. If you need to transport them, arrange them on a shallow container lined with parchment paper and handle gently to keep everything in place.
- Make your clovers no more than 30 minutes before serving to keep cucumbers at their crispest and flavors at their brightest
- If assembling for a lunchbox, transport components separately and assemble just before eating to preserve texture
- These don't keep overnight, so enjoy them fresh or plan to make them the day you'll serve them
 Save
Save There's something quietly powerful about taking simple ingredients and arranging them into something that makes people smile before they even take a bite. These lucky clovers remind us that the smallest gestures—a little intentionality, a dash of playfulness, a moment of care—are what transform feeding people into nourishing them.
Recipe Questions & Answers
- → What can I use instead of celery for the stem?
Thin pretzel rods work well as a crunchy alternative to celery sticks, providing a different texture.
- → Can this snack be made gluten-free?
Yes, use celery sticks instead of pretzel rods to keep this snack gluten-free.
- → How do I keep the ingredients from sliding apart?
A small amount of cream cheese or hummus acts as a natural adhesive to hold the layers in place.
- → Are there alternatives for the cheese layer?
You can substitute cheddar with turkey or ham rounds for added protein and variety.
- → What herbs pair well as a garnish?
Fresh parsley or dill finely chopped adds a bright herbal note and enhances appearance.